Kato N Scale NW2 ZIMO MS-NW2_A246 DCC Decoder Installation
Last Updated 251214
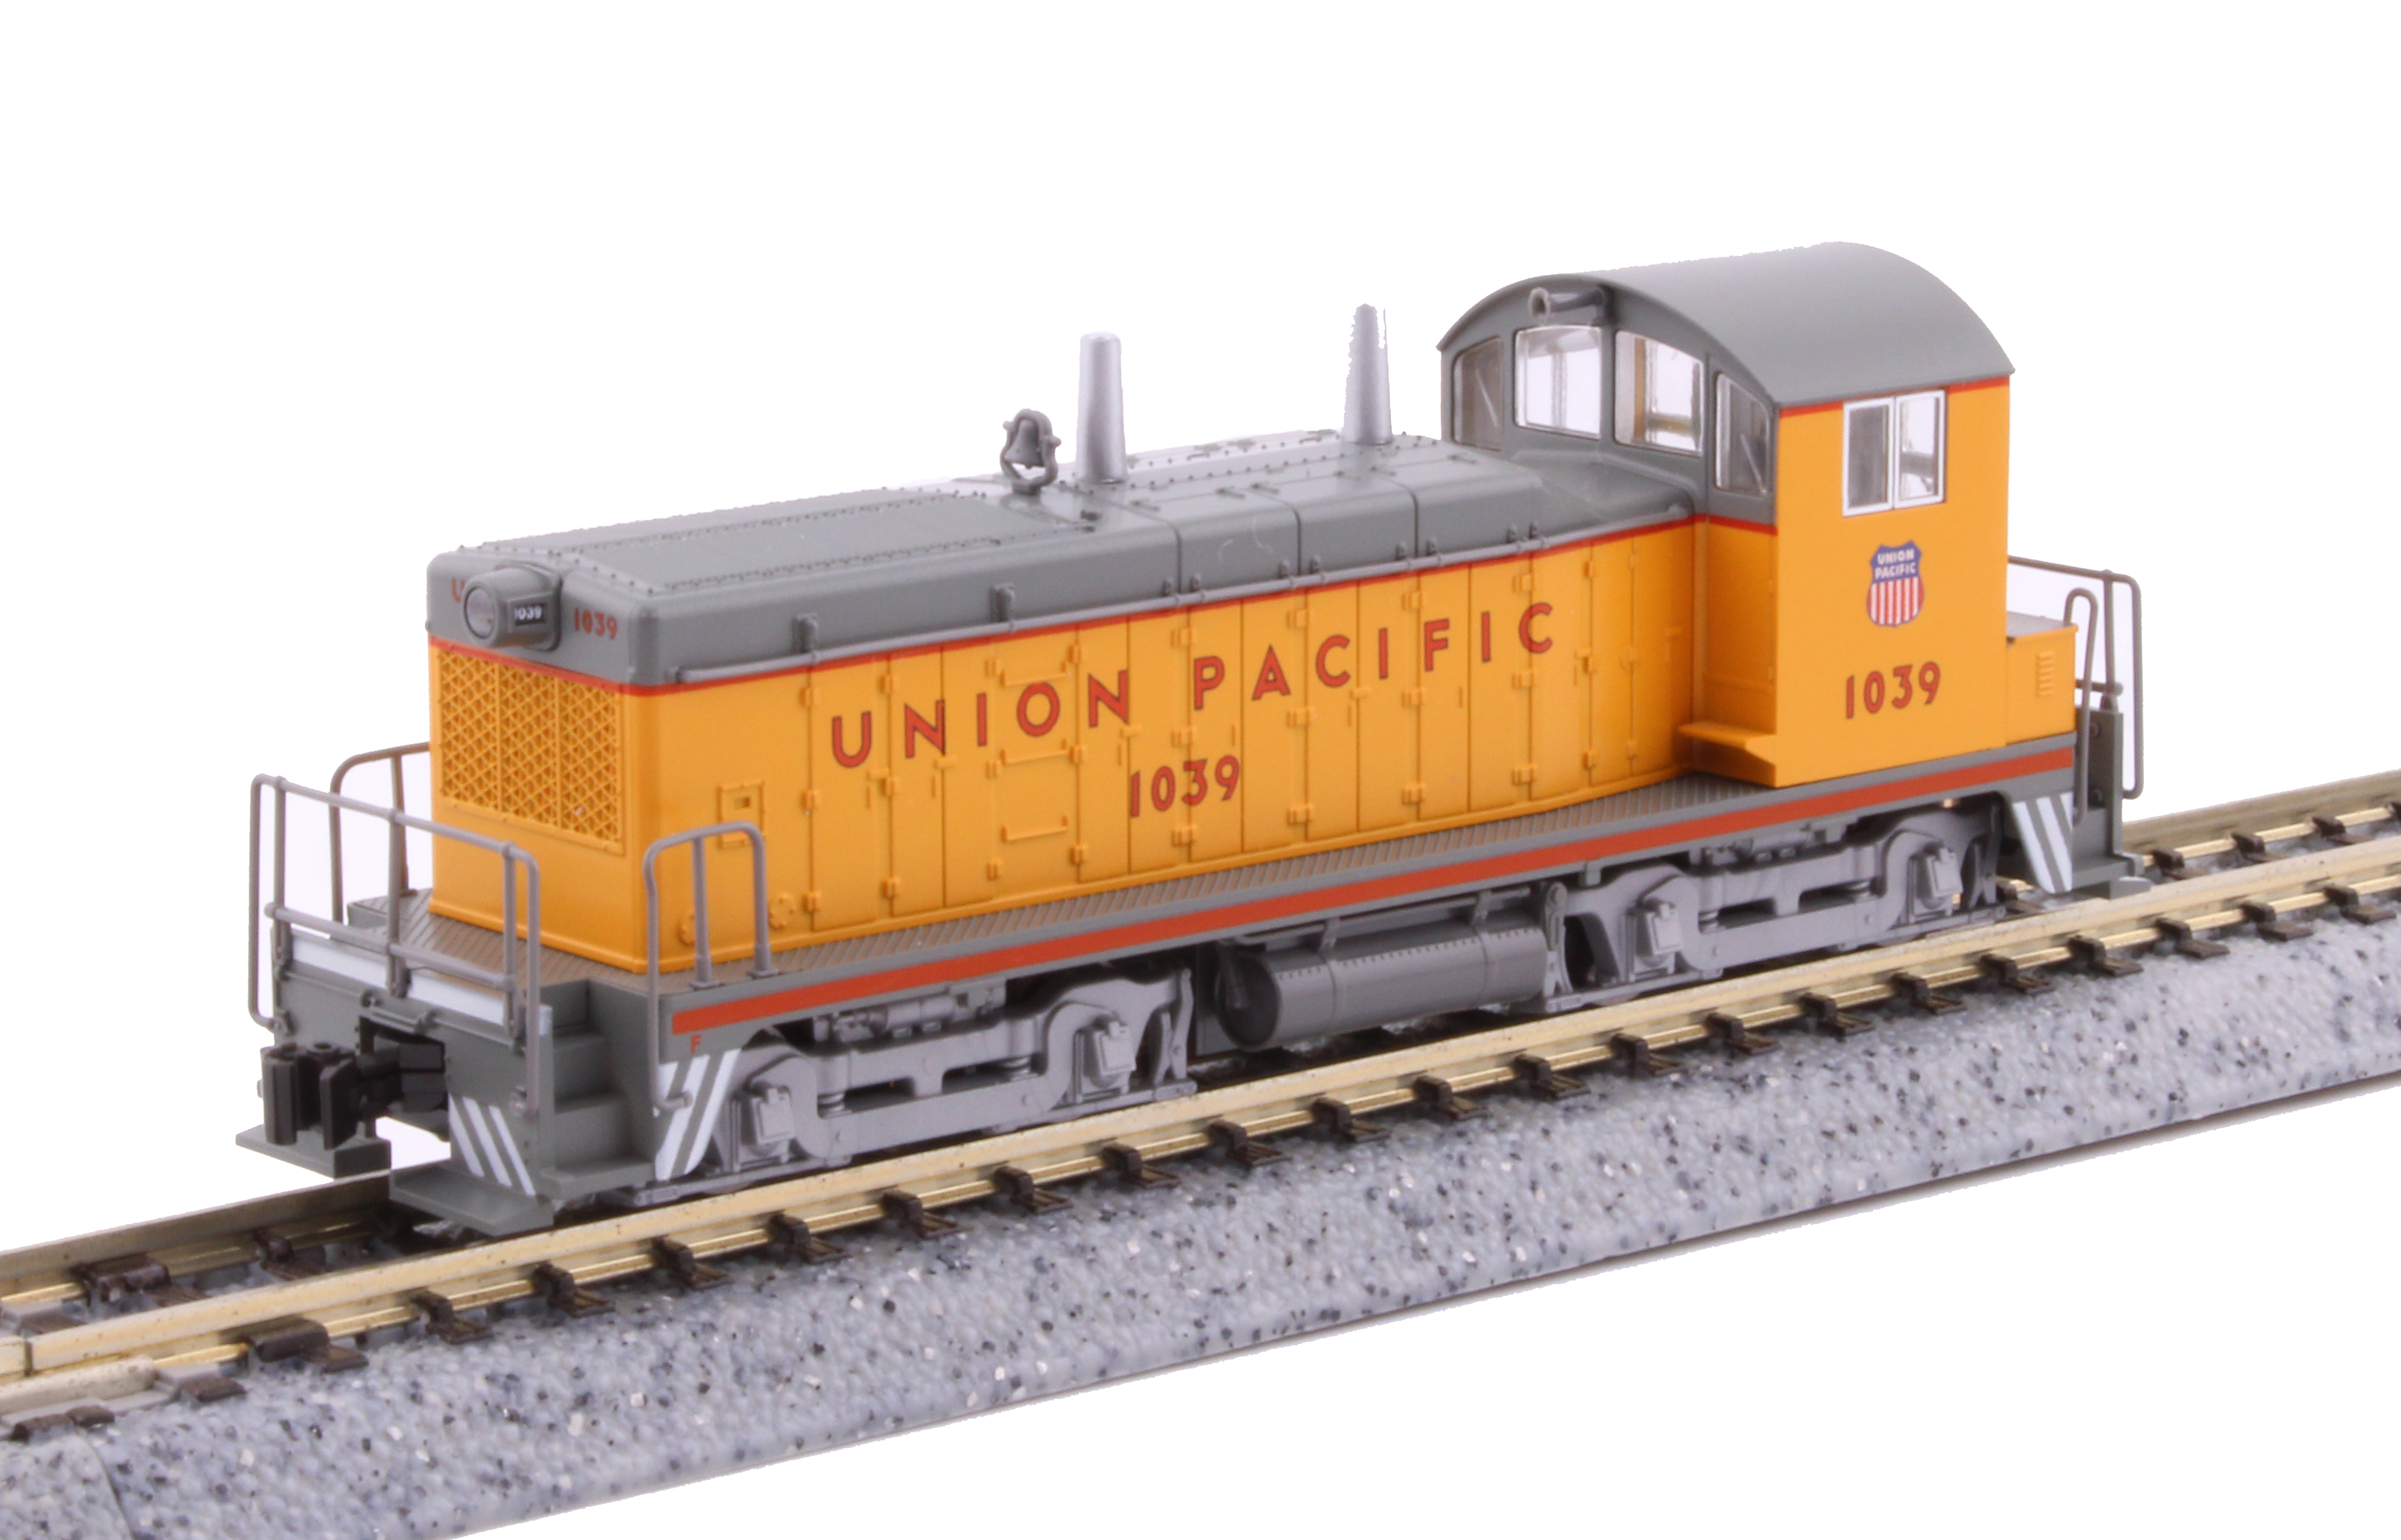
DCC Decoder installation instructions for the Kato N Scale NW2 with ZIMO MS-NW2_A246 DCC Sound Decoder and SBS4DCC "Tailor-Made" speaker enclosure.
Recommended sound file is ZSP01635 EMD_NW2_ZIMO-Kato_16-bitS02.zpp developed for the Kato OEM project.
Alternate sound file is ZSP00726 EMD 12-567.zpp.
Originally published on September 28, 2025.
Supplies:
- ZIMO MS-NW2_A246 Micro Direct DCC Sound Decoder - N Drop-in Board for Kato NW2
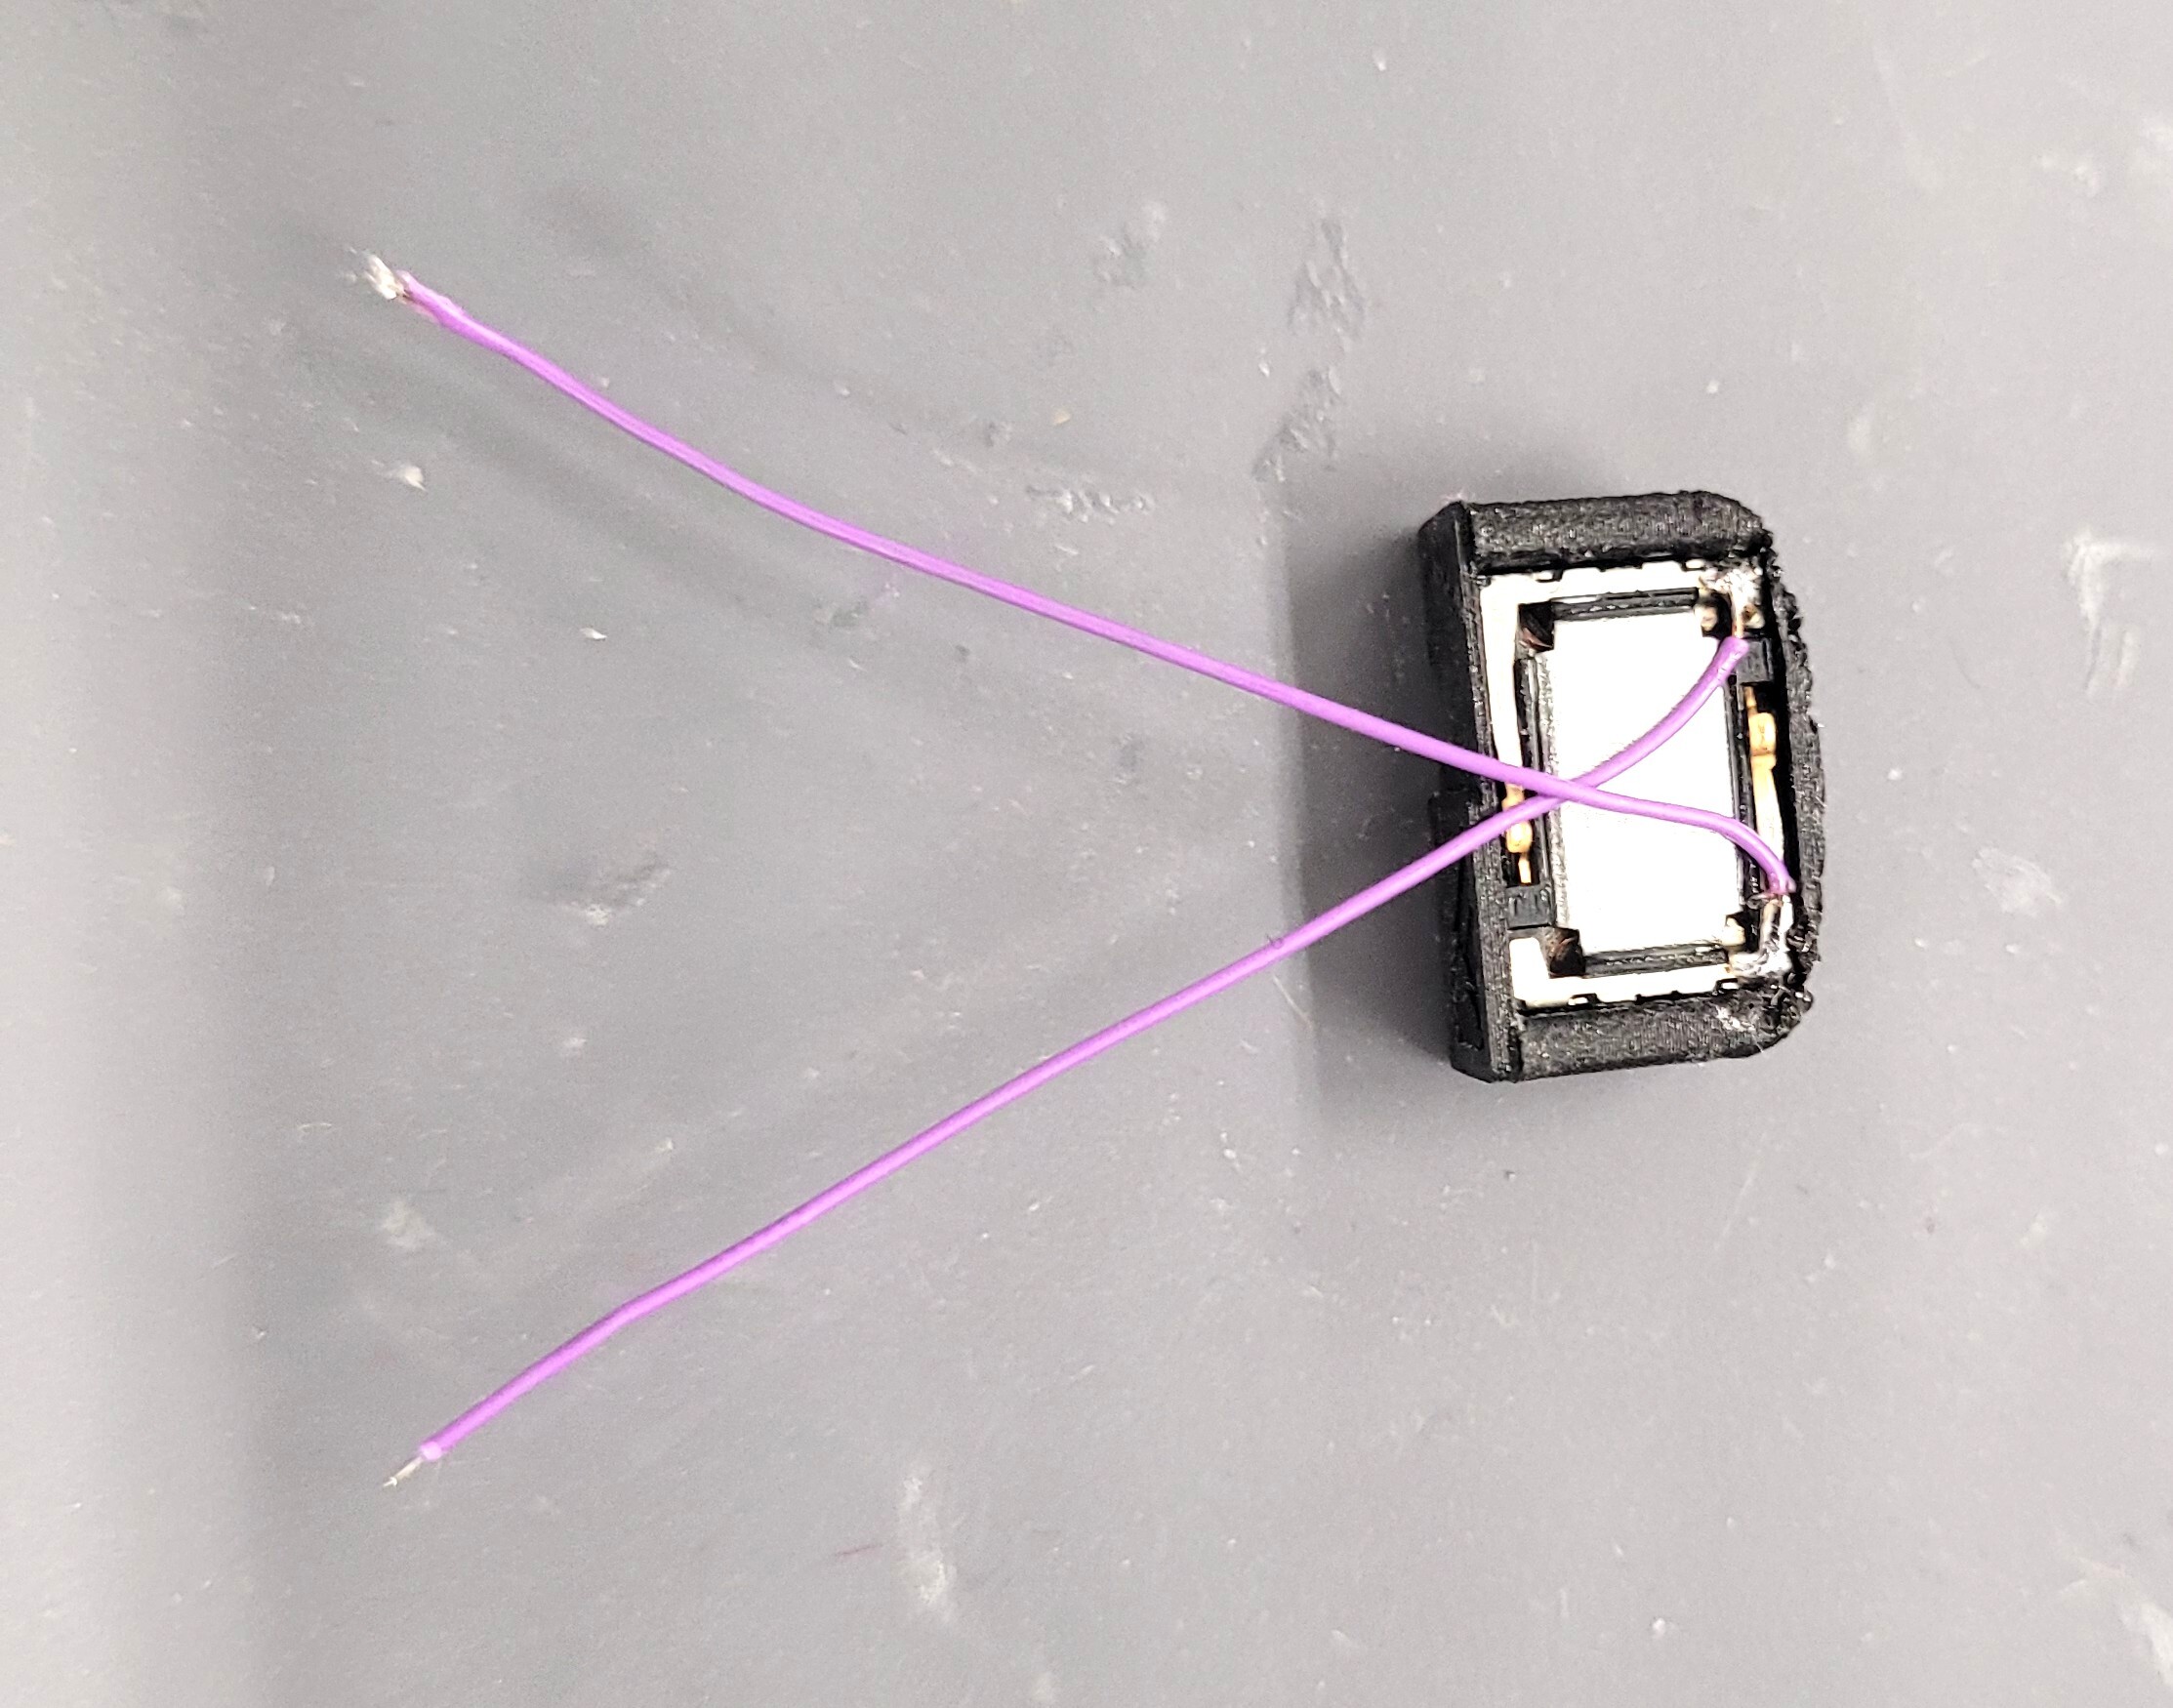
- SBS4DCC 4181 "Sugar Cube" Speaker 8x12mm 8 ohm .7 watt w/ N Cab Roof Sound Chamber for N Kato NW2
- Kapton Tape
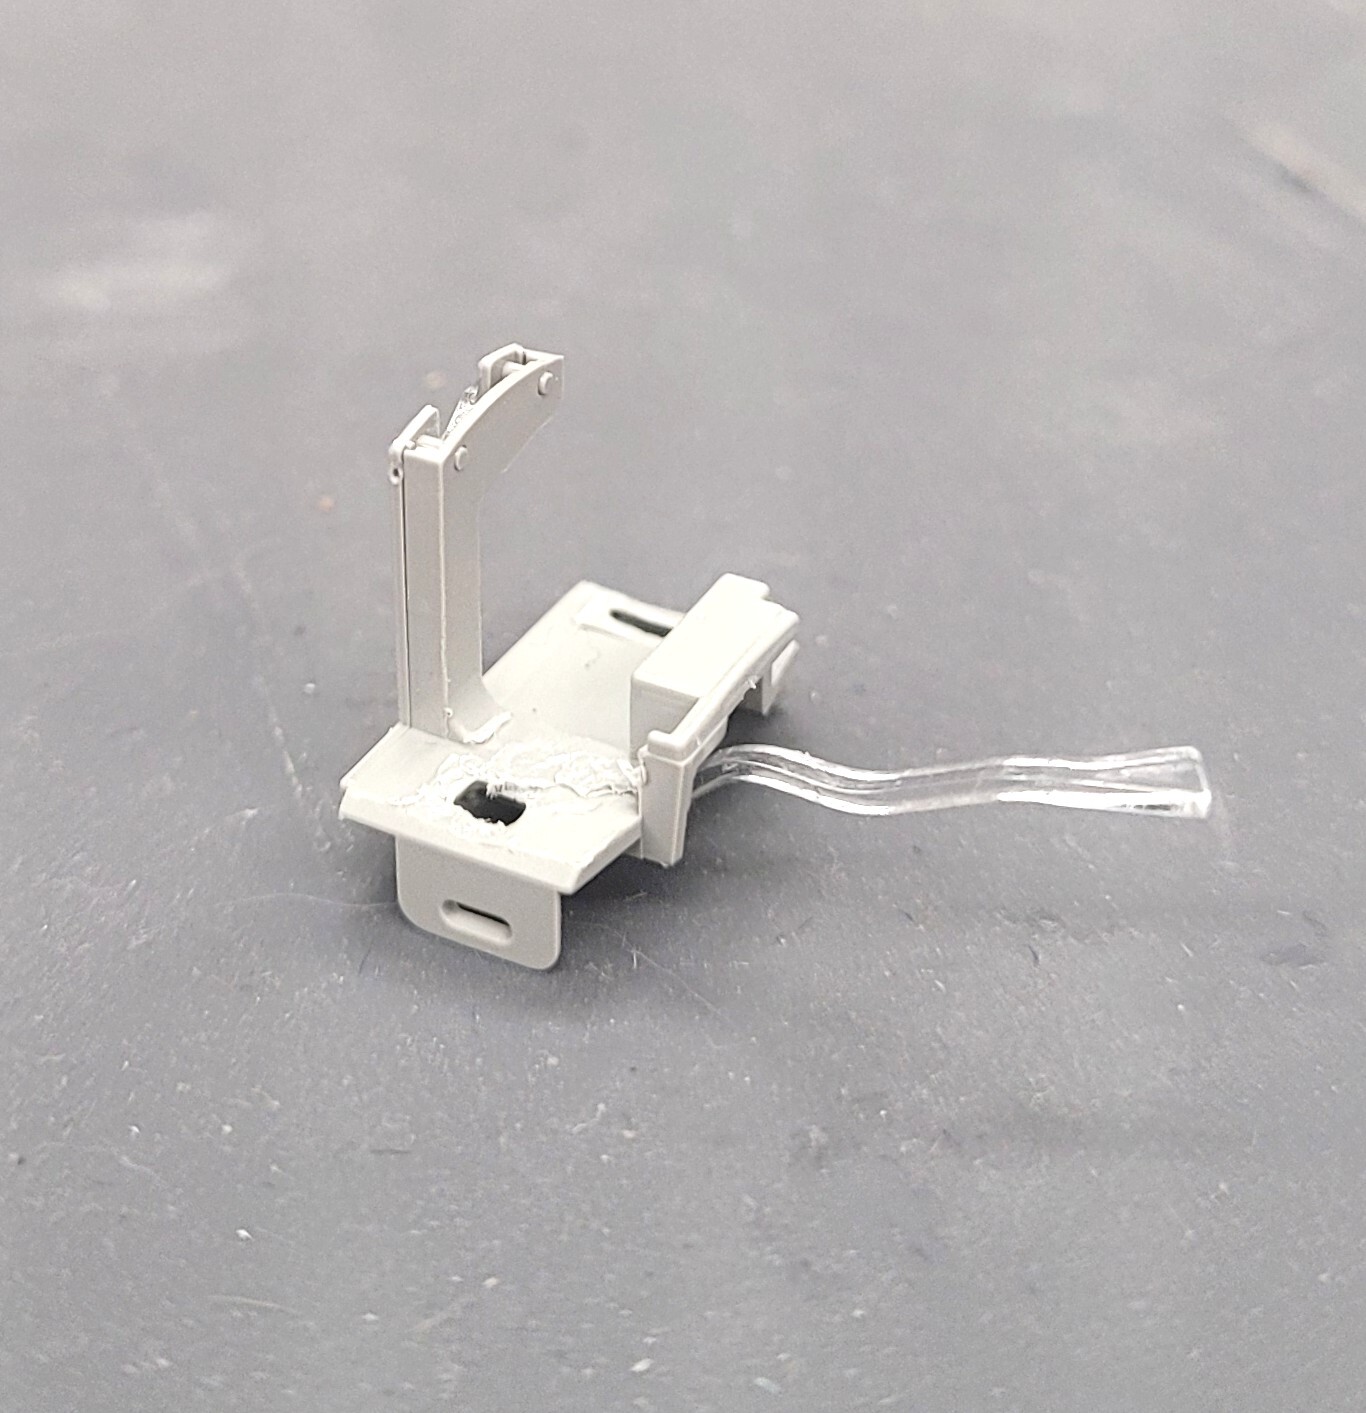
- Modified interior insert for speaker
- Hobby Knife
- Flush-cut pliers
- Optional blackened out cab interior windows
- Function amplifier board if you want to utilize the two logic level outputs for additional lighting
Installation Notes:
- Assemble speaker and enclosure
- PRO TIP: Seal all seams to insure the are no air leaks in enclosure
- Attach 2" long 30-36ga wires to speaker contacts
- Remove cab interior assembly from model
- Remove motor tabs from OEM board
- PRO TIP: Use a hobby knife to gently pry the tabs away from motor brush housings and board
- Remove OEM board from model
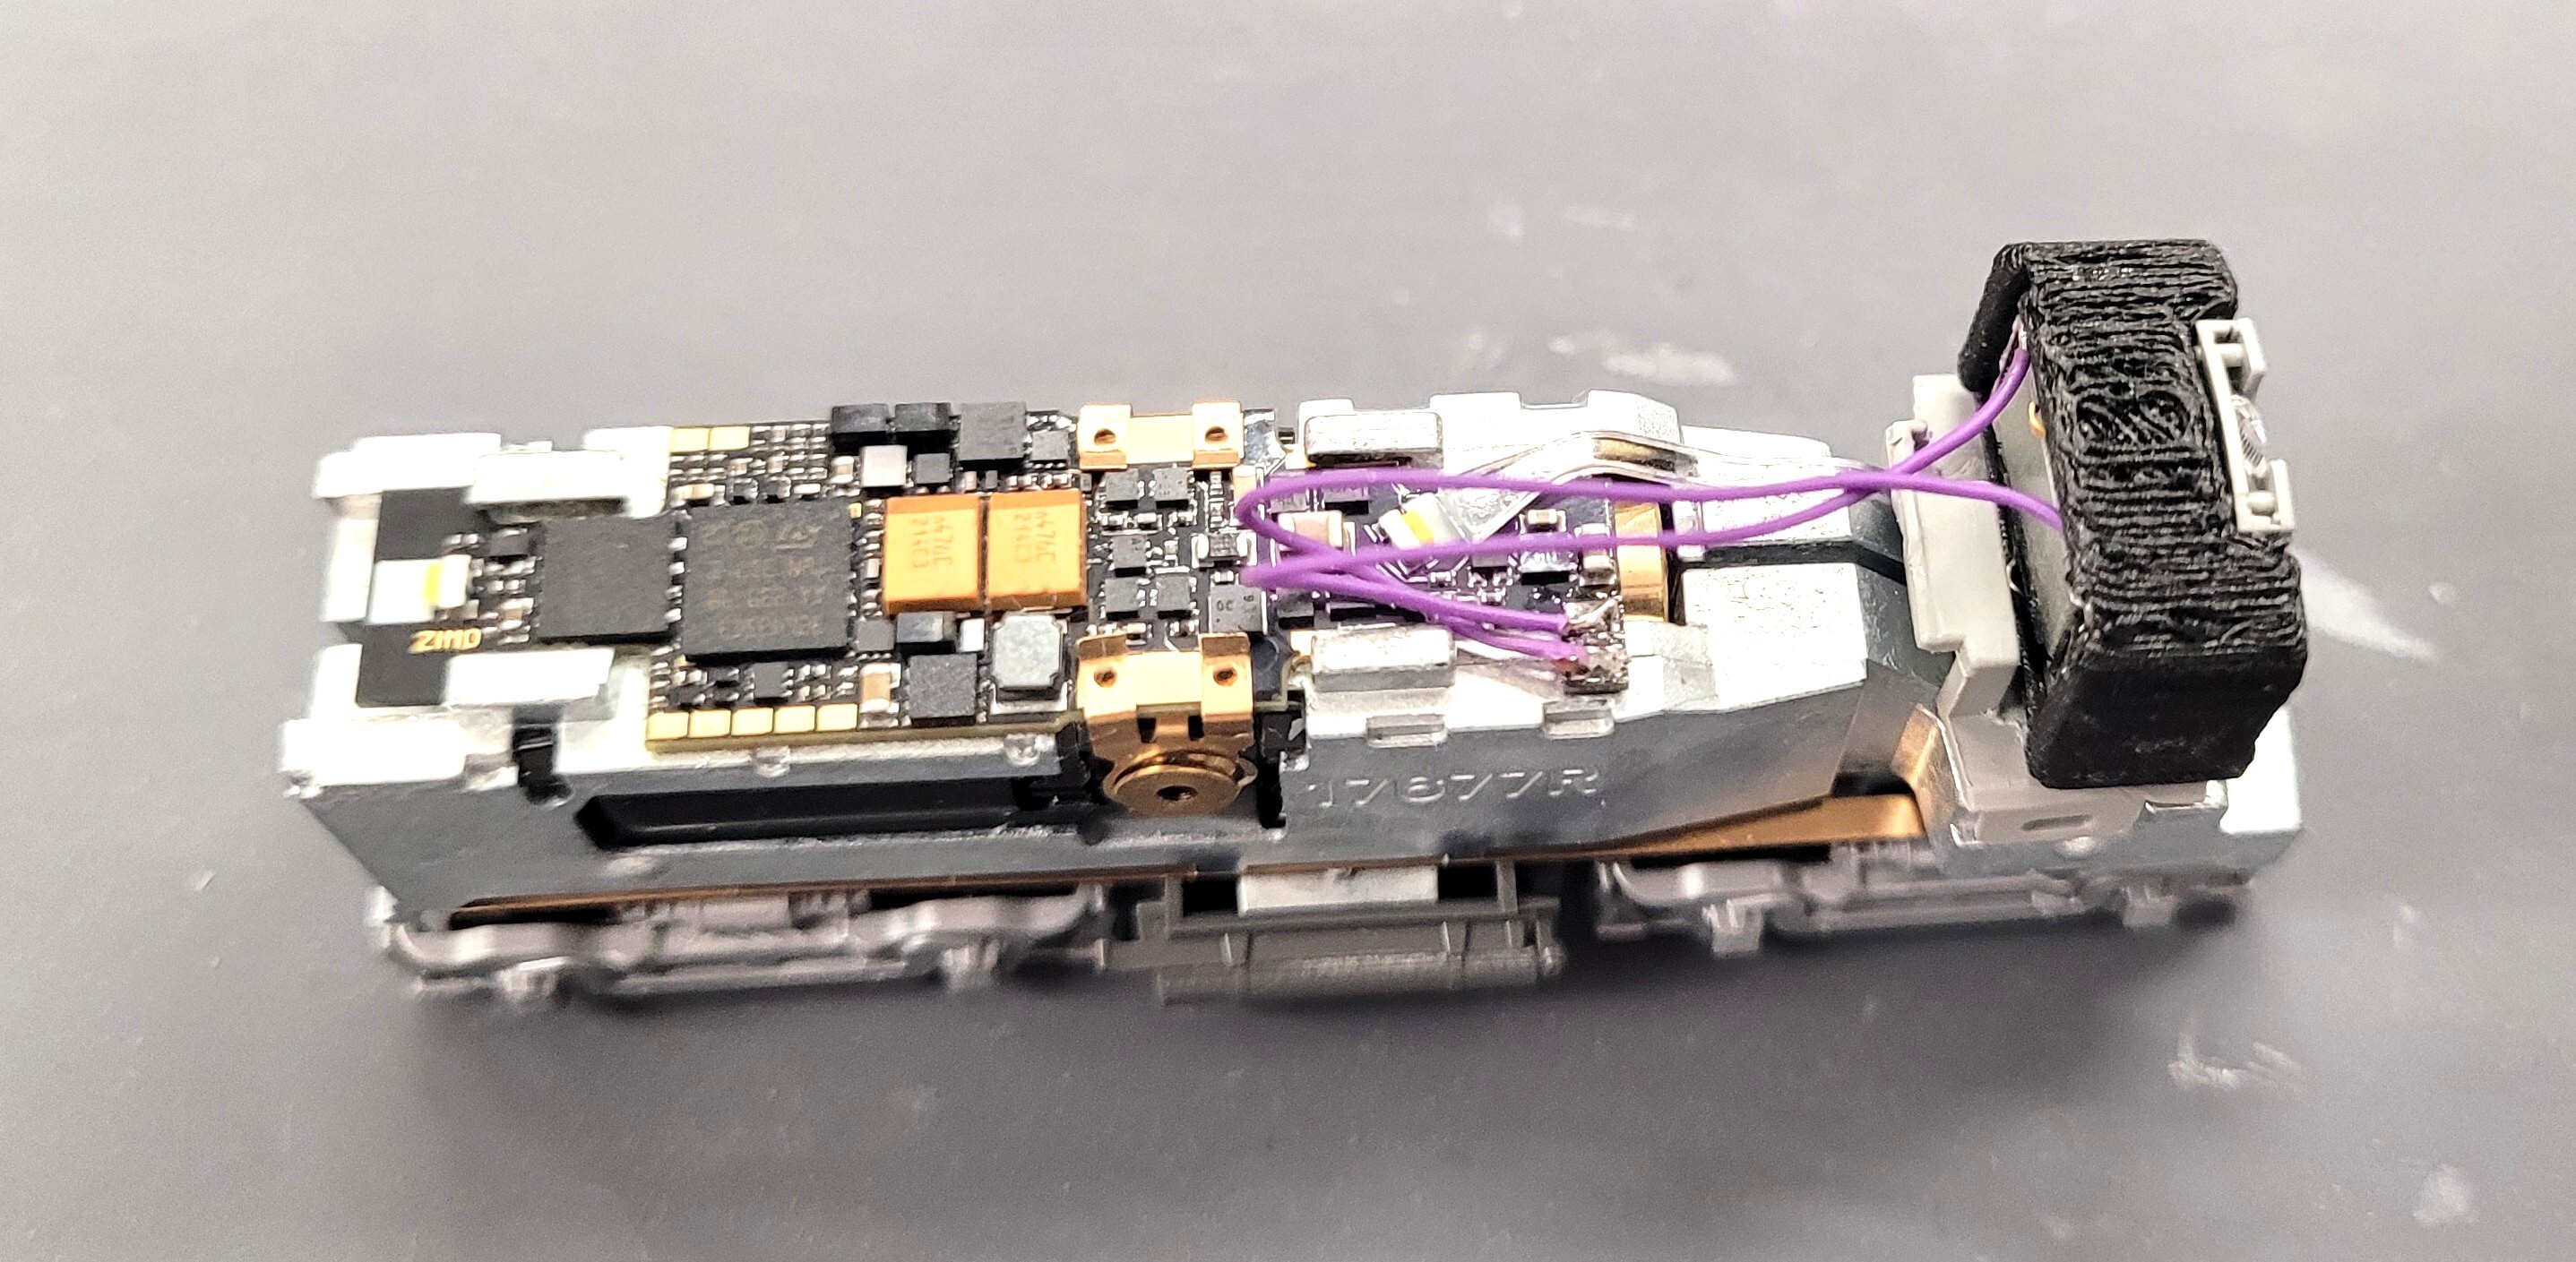
- Mate ZIMO NW2_A246 decoder to frame
- Mate motor tabs to ZIMO NW2_A246 decoder and motor brush housings
- Modify cab interior insert as shown
- Mate speaker enclosure to cab interior insert
- Solder speaker wires to decoder
- Mate speaker/interior assembly to frame
- Test the decoder installation
- PRO TIP: Read CV3 value before applying track power. If you cant read a CV there is an issue with the installation.
Installation Pictures:

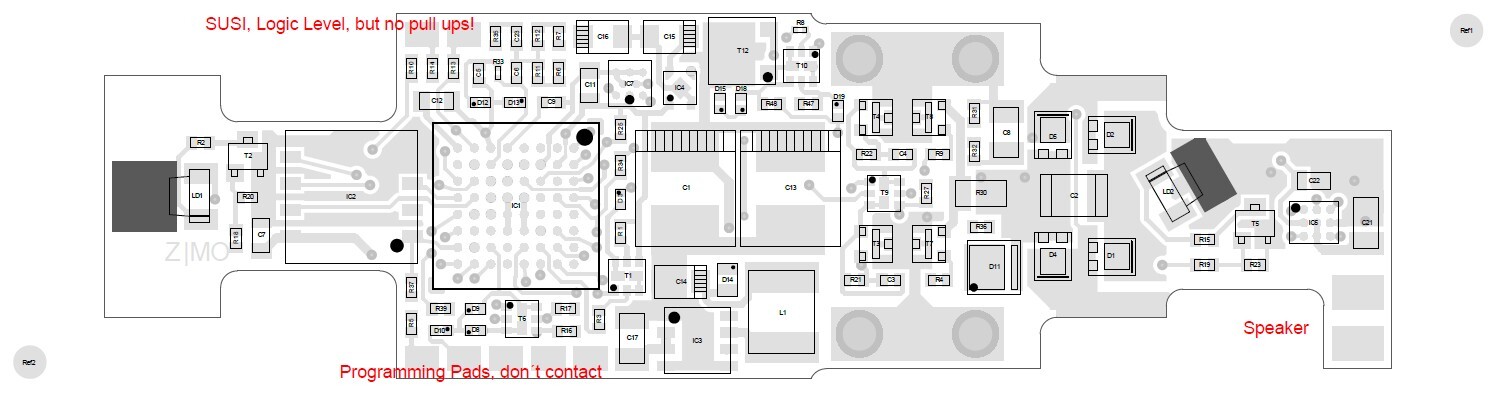
About the FO3 and FO4 Logic Level Outputs:
There are two on-board LED's for front and rear headlight. The front light is decoder function output FO0f and rear light is decoder function output FO0r.
The two solders pads where I have written SUSI and logic level are FO3 and FO4.
You can use the M4000Z to amplify a logic level output … so if you want to use both solderpads (FO3 and FO4) you need two M4000Z.
- PRO TIP: The SBS4DCC Function Amplifier Board amplifies two logic level outputs per board.
If you want to use FO3 and FO4 on the KATO NW2 Onboard-Solution, you need to turn off the SUSI signal, which is ex work put on these two solderpads.
So send a CV-write command with CV#201=11 via a real command station (CV#201 = special kind of CV-number, so triggers a process (like CV#8, CV#302, ...) … and therefore such (special) CV-numbers should not be set via programmer with any PC software involved (it may not work proper if it is done), always use a DCC command station (even very old ones are fine) for them, as then it always works).
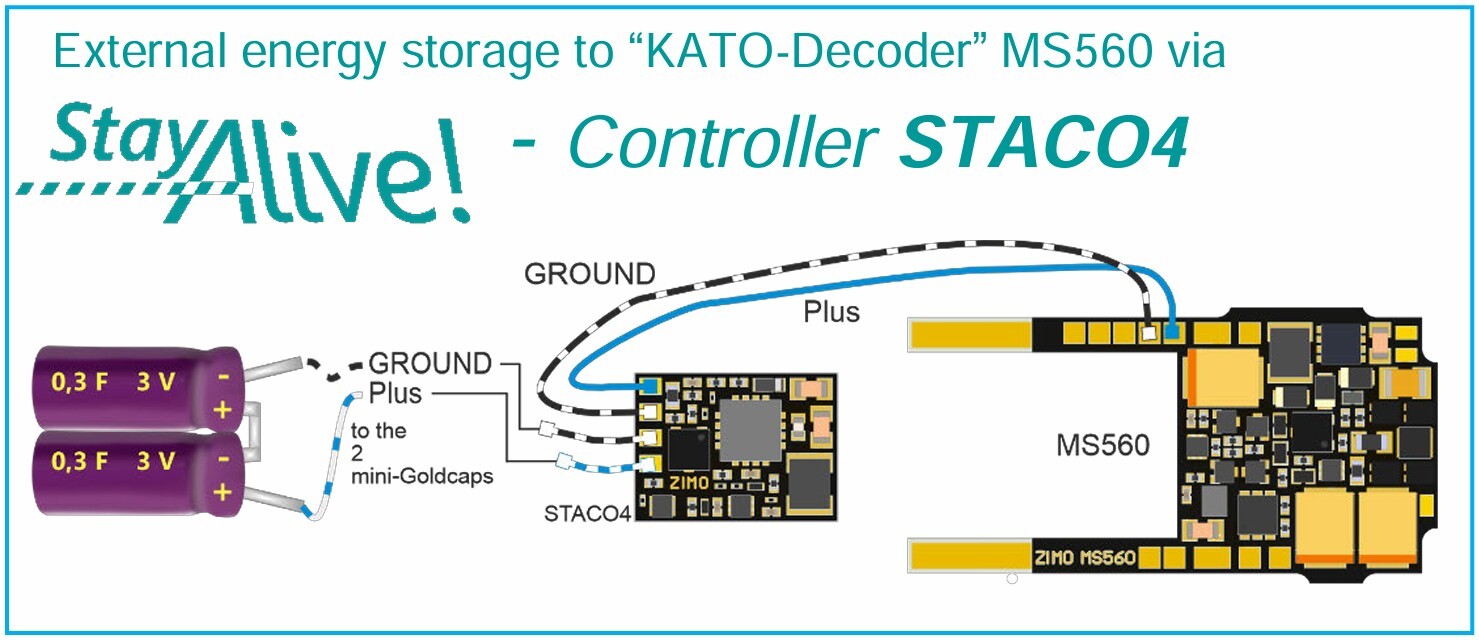
About the MS-NW2_A246 and Stay-Alive Capacitors:
Adding a stay-alive to this model is not for the faint of heart. In fact, I would call you crazy for trying but... Someone will want to try so I asked the question to be sure I got the info right. Per ZIMO, "On-Board-Solution are not for "pimping" designed … as usually if there is enough space for a stay alive solution in a model with On-Board-Solution it will be already on the custom made PCB itself included". But yes, you can connect a capacitor to many ZIMO decoders via the (+) Common and (-) Ground pads in the standard block of factory programming pads.
The five programming pads of KATO NW2 Onboard-Solution have the same "signals" as the five programming pads of the MS540 – so the one in the corner (on the backside of KATO NW2 you find a printed "+" indicating it also) is "common positive" and the pad next is "ground" – you may use them to connect a stay alive solution WITH a load/discharge current limitation (if you find enough free space) … so directly connecting an elco (or any other capacity) is NOT allowed, you NEED the external load/discharge circuit also for a capacity.
As usual the common positive is rectified track voltage (of the used command station) … so not only the current need to be limited, also the voltage strenght is important, as the common positive has no voltage limitation (in comparison to "elco plus", where you have at some series a limitation to 15,5V – so that 16V elcos are not in danger).
So you either take a STACO solution (STACO PCB includes voltage and current limitation) OR make an external circuit with diodes, resistor and capactor as shown on page 16 of the MS/MN-decoder manual (https://www.zimo.at/web2010/documents/MS-MN-Decoders_EN.pdf) for the MS560-series.
ZIMO ZSP00726 EMD 12-567 Sound Project Notes:
The EMD 567 is a line of large medium-speed diesel engines built by General Motors' Electro-Motive Division. This engine, which succeeded Winton's 201A, was used in EMD's locomotives from 1938 until its replacement in 1966 by the EMD 645. It has a bore of 8.5 in (216 mm), a stroke of 10 in (254 mm) and a displacement of 567 cu in (9.29 L) per cylinder. Like the 201A, the EMD 645 and the EMD 710, the EMD 567 is a two-stroke cycle engine. It is a V engine with an angle of 45° between cylinder banks (the 201A was 60° between cylinder banks; 45° later proved to be significant when EMD subsequently adapted the road switcher concept for most of its locomotives, and which required the narrower (albeit taller) engine which 45° provides).
The EMD 567 12cyl. is used in many prototypes:
SW9, SW1200, G12, NW-2, NW-3, NW-5, SW-7, SW-9, GMD-1, etc.
Source Wikipedia
Project settings and information:
The project was realised in the new 16-bit technology for ZIMO MS decoders and is customized for the model of Kato in N-gauge.The ZIMO sound decoders MX64x (H0) and MX69x (large-scale) can be installed in all suitable models with this project.
- The decoder software must be at least version 35.15.
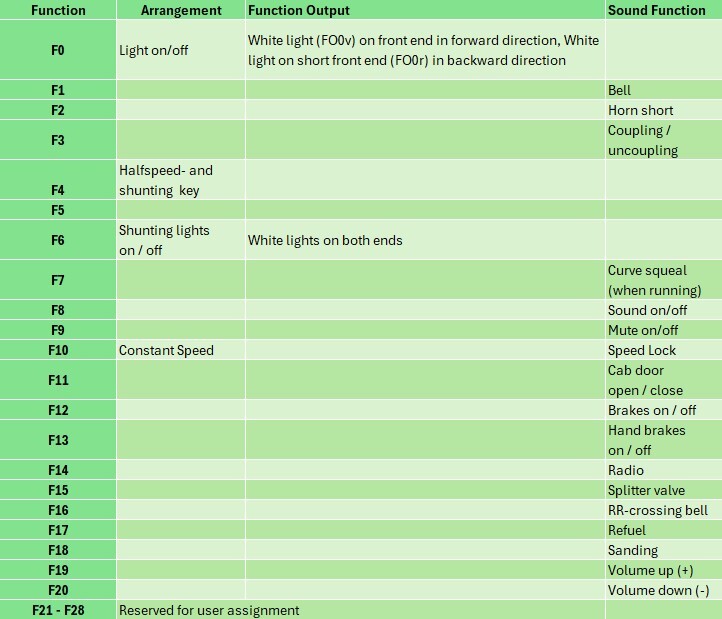
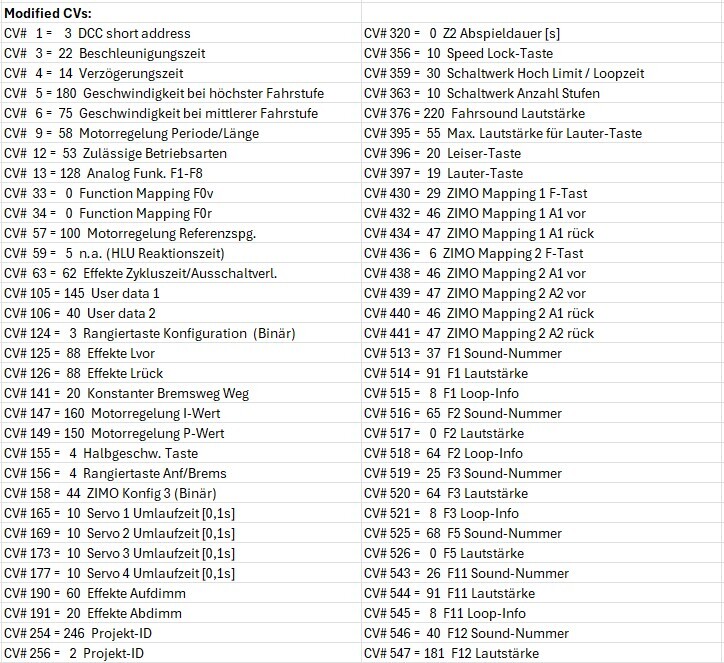
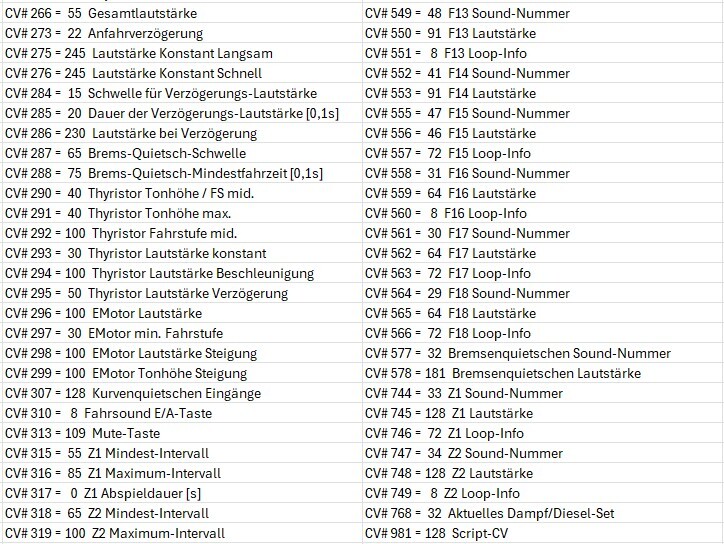
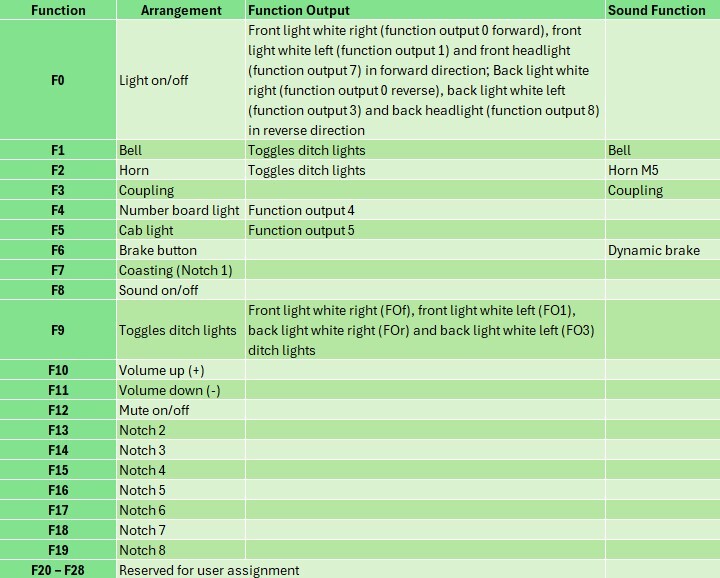
- The ditch lights will be activated, if the bell or horn is played (CV 393 Bit0 = 1 activates ditch light if bell is played, CV 393 Bit1 = 1 activates ditch light if horn is played).
- Attention: Please note that this project use a special brake button on F6. Decrease the throttle to zero. While the loco is coasting, push F6 to actually engage the brakes. This simulates a far more realistic brake operation. If you don’t want to use the brake button for braking, you have to modify the CV 4 to a lower value, for example 20.
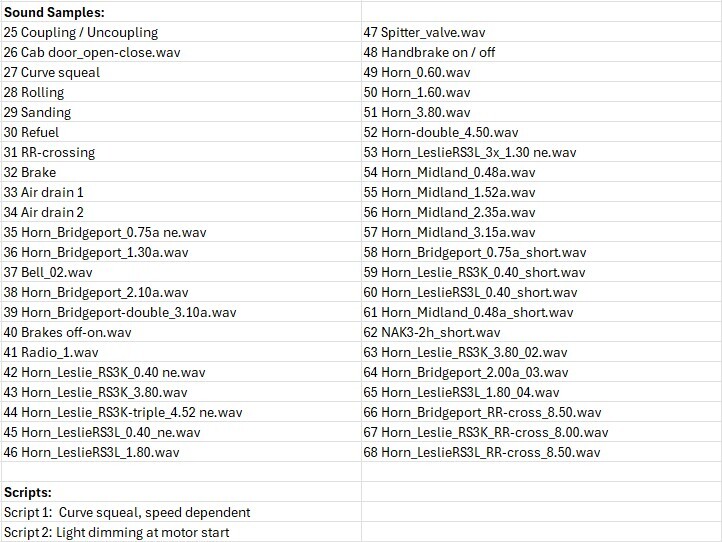
- This project includes various horns: Nathan K3H long (33), Nathan K3H short (34), Nathan K5LLA (35), Nathan M5 (36), Nathan M3 (37), Nathan P3 (38), Nathan P5 (39), Leslie RS3K (40), Leslie RS3L (41) and Leslie RS5T (42). You can easily switch the horns in ZIMO Sound Programmer (ZSP) or modify CV 516 by changing its value to the above mentioned. You can also add other horns/sounds into this project in ZSP. You can switch the bells by modifying CV 513 from 30 to 31 or 32.
ZIMO ZSP01635 EMD NW2 ZIMO-Kato Sound Project Notes:
The EMD NW2 is a 1,000 hp (750 kW), B-B switcher locomotive manufactured by General Motors Electro-Motive Division of La Grange, Illinois. From February 1939 to December 1949, EMD produced 1,145 NW2s: 1,121 for U.S. and 24 for Canadian railroads. Starting in late 1948, the NW2s were manufactured in EMD's Plant #3 in Cleveland, Ohio. The locomotives were powered by a 12-cylinder model 567 engine and later a model 567A engine. The "N" in NW1 stands for the nine in nine hundred hp (670 kW). The "W" in both models stands for "welded frame".
Source: Wikipedia
Project settings and information:
The project was realised in the new 16-bit technology for ZIMO MS decoders and is customized for the model of Kato in N-gauge.
- The decoder must have at least software version 5.15.
- The decoder can be controlled at address 3
- The model also runs in analog mode, no programming is needed.
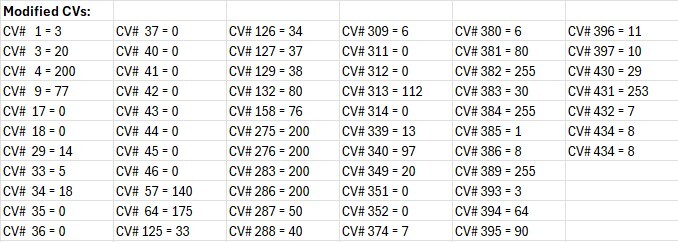
- To ensure the functionality of the project, CV values should only be changed very carefully.
- A decoder reset can be carried out using CV #8 = 8.
- If the sound is to be switched on/off with key F8, the following CVs must be programmed: - CV 401 = 8 - CV 408 = 1
- Random sounds: Z1 = air drain 1; Z2: air drain 2
- The decoder used in the Kato models is a special ZIMO loco board decoder without interface produced especially for this model.